
 (C:)
(C:) AliCloud
 【搞机小子】Airpi AP3000M 5G CPE 使用体验
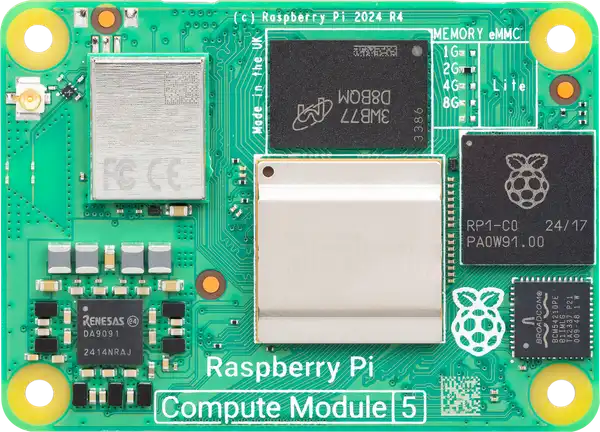
2024年11月27日,在距第一款商用 Raspberry Pi Model B(于 2012 年 2 月 29 日推出)发布整整12年之后,Raspberry Pi 基金会发布了 Raspberry Pi Compute Module 5(CM5)。这款产品的发布标志着 Raspberry Pi 进入了一个新的阶段,特别是在工业和嵌入式应用领域。
Raspberry Pi CM5 是一款基于 Raspberry Pi 4 的计算模块,采用了更小的尺寸和更高的集成度,旨在满足工业和嵌入式应用的需求。它配备了强大的处理器、丰富的接口和扩展能力,使其成为各种应用场景的理想选择。
测试点位
废话不多说,直接进入正题,以往的 Raspberry Pi 系列产品都可以通过 JTAG 进行调试,但 CM5 的 JTAG 接口并不直接暴露出来。同时我们需要使用 OpenOCD 来对其进行调试。
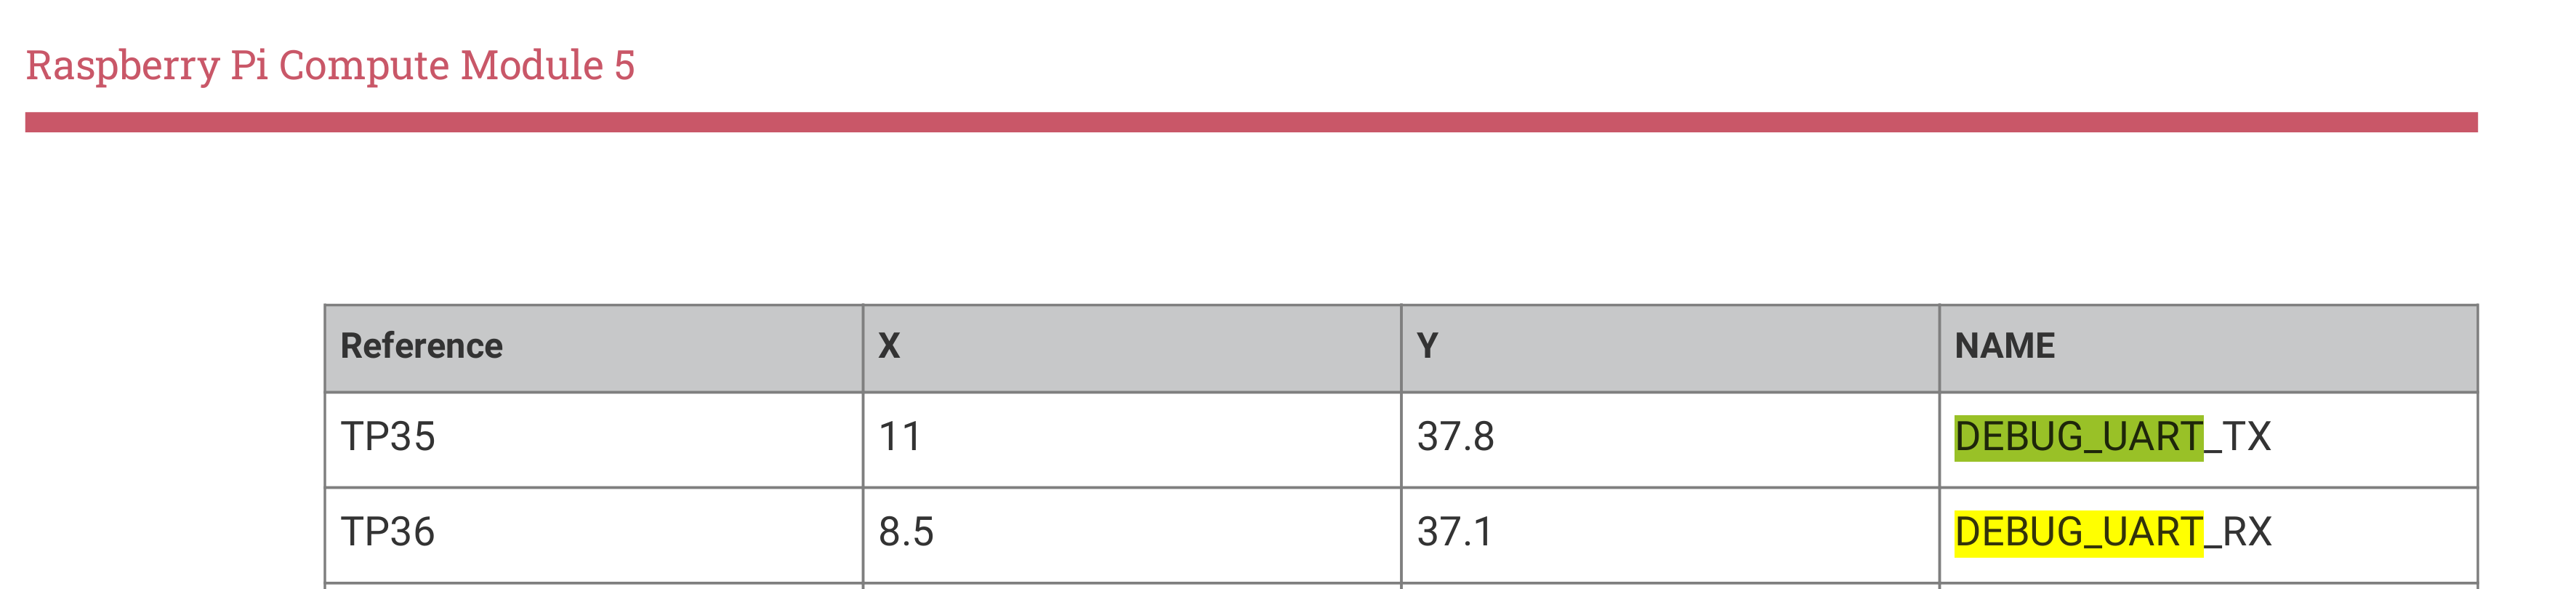
根据官方提供的数据手册,我们可以看到 CM5 的 JTAG 接口位于 Wi-Fi 模块背面的测试点位,具体位置参见文档第37页。
具体焊接点位如下,橙色线和黄色线是对应原版树莓派 Debug Probe 的线的颜色:
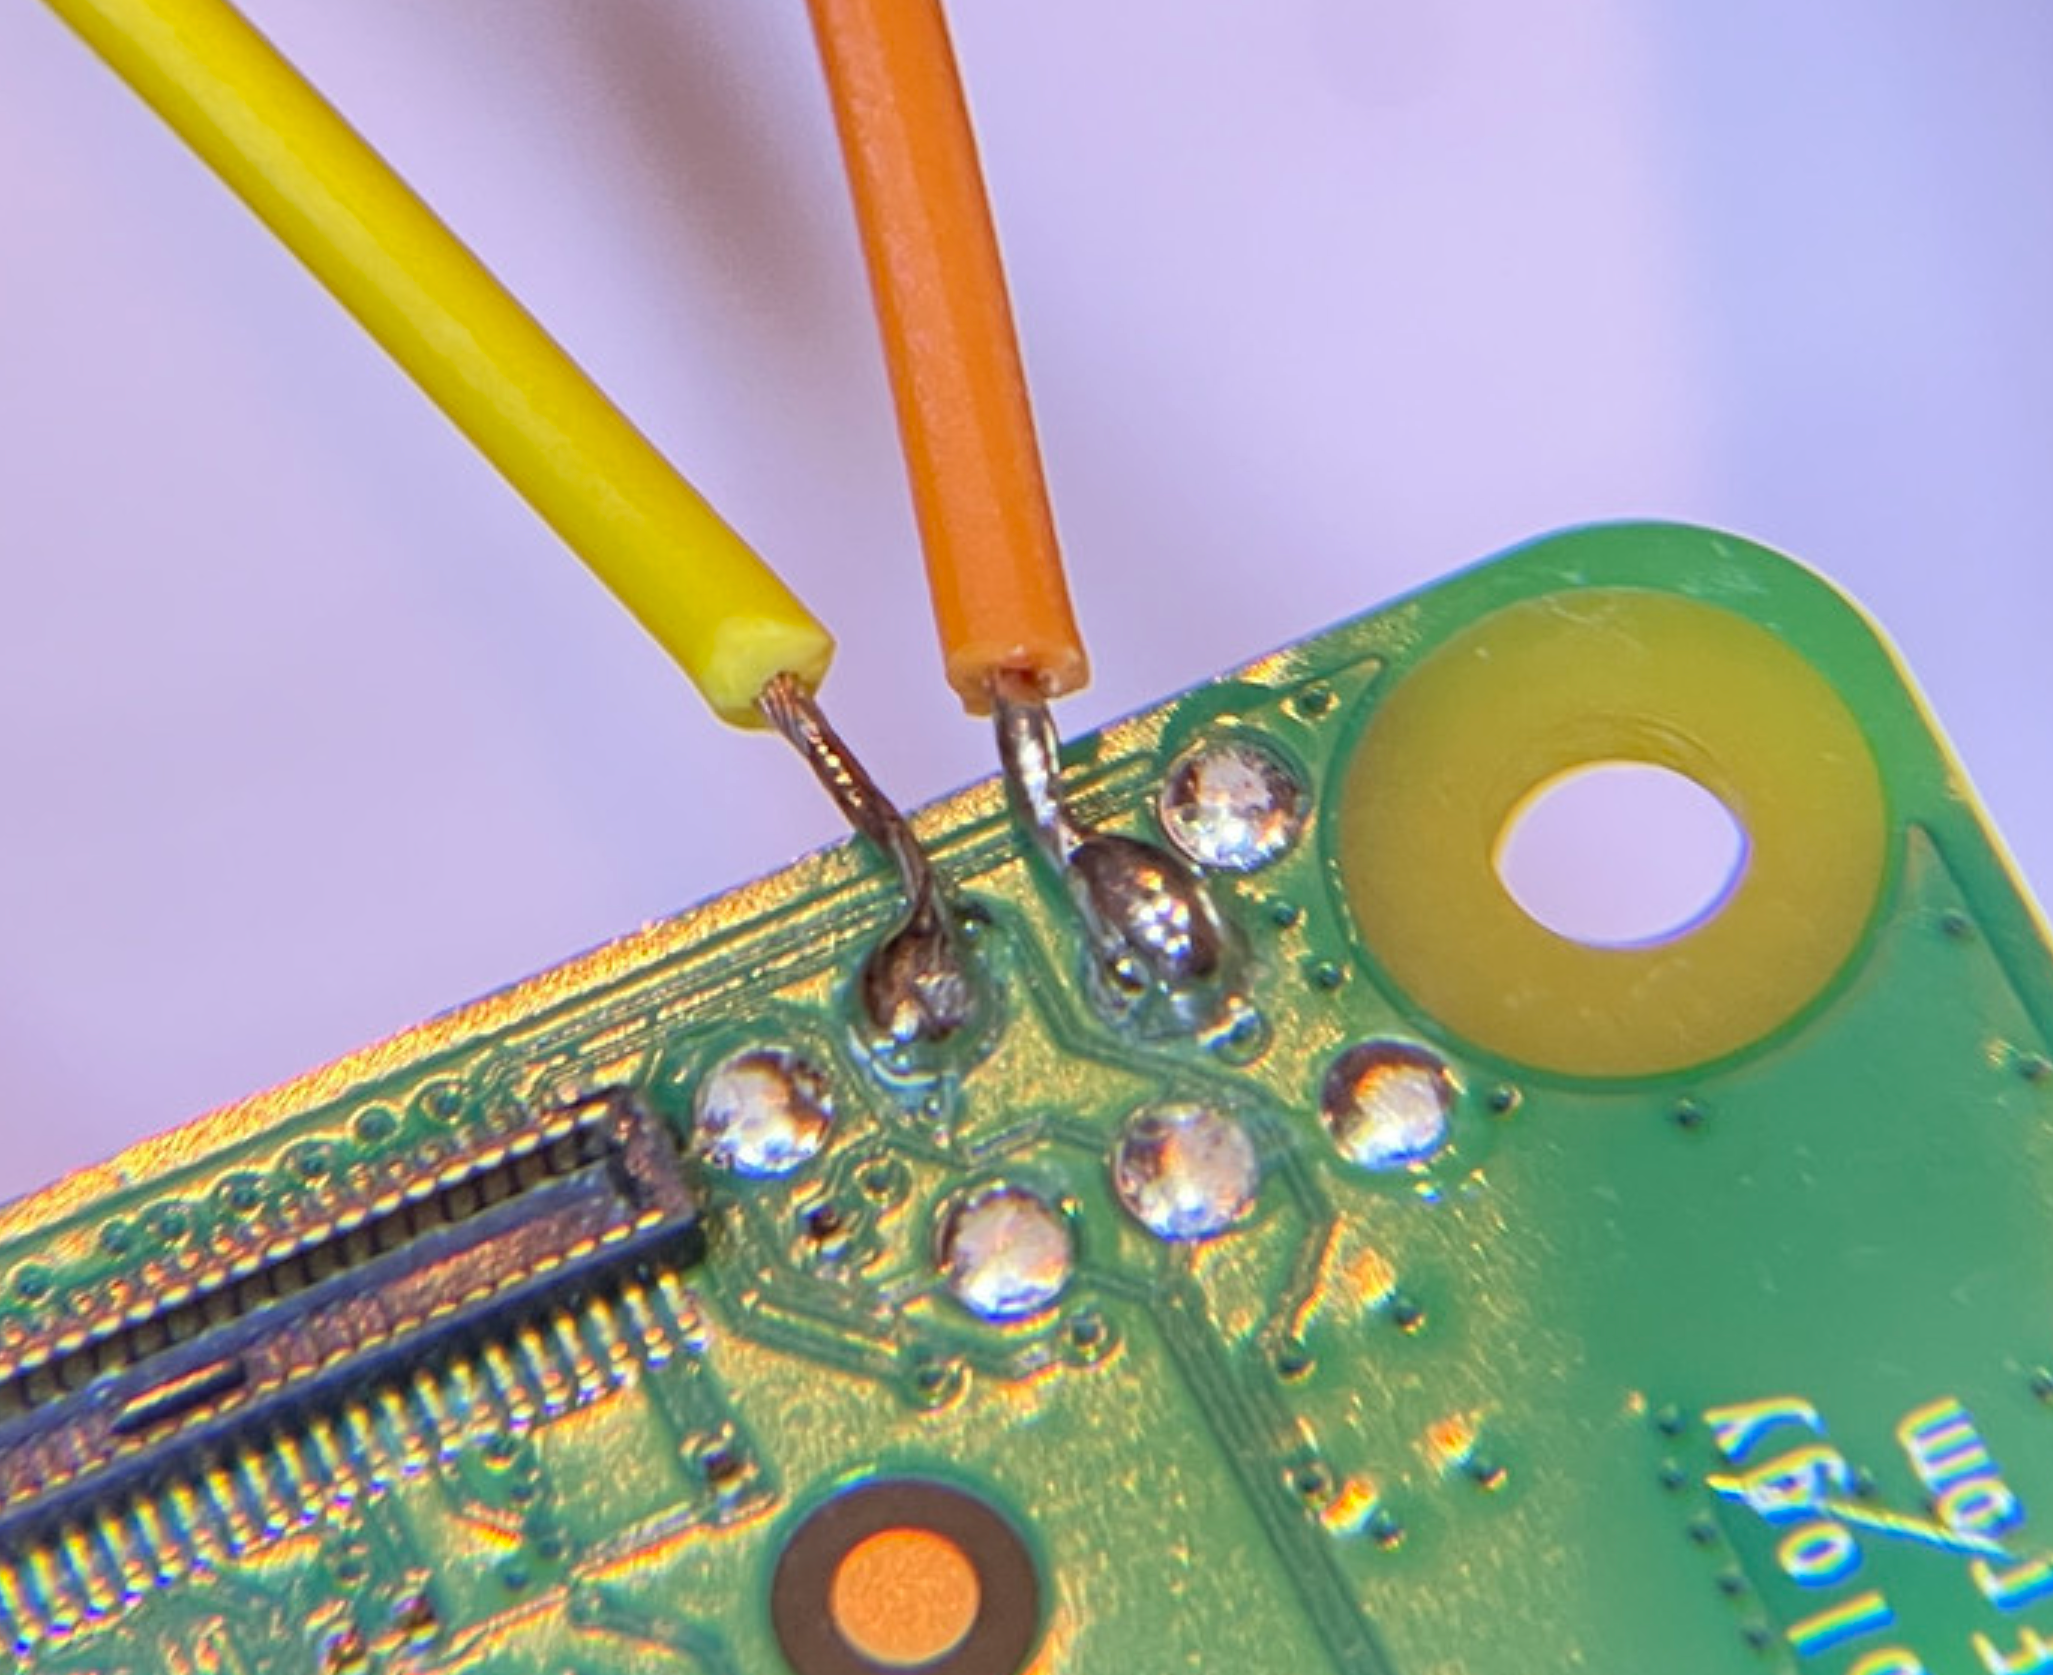
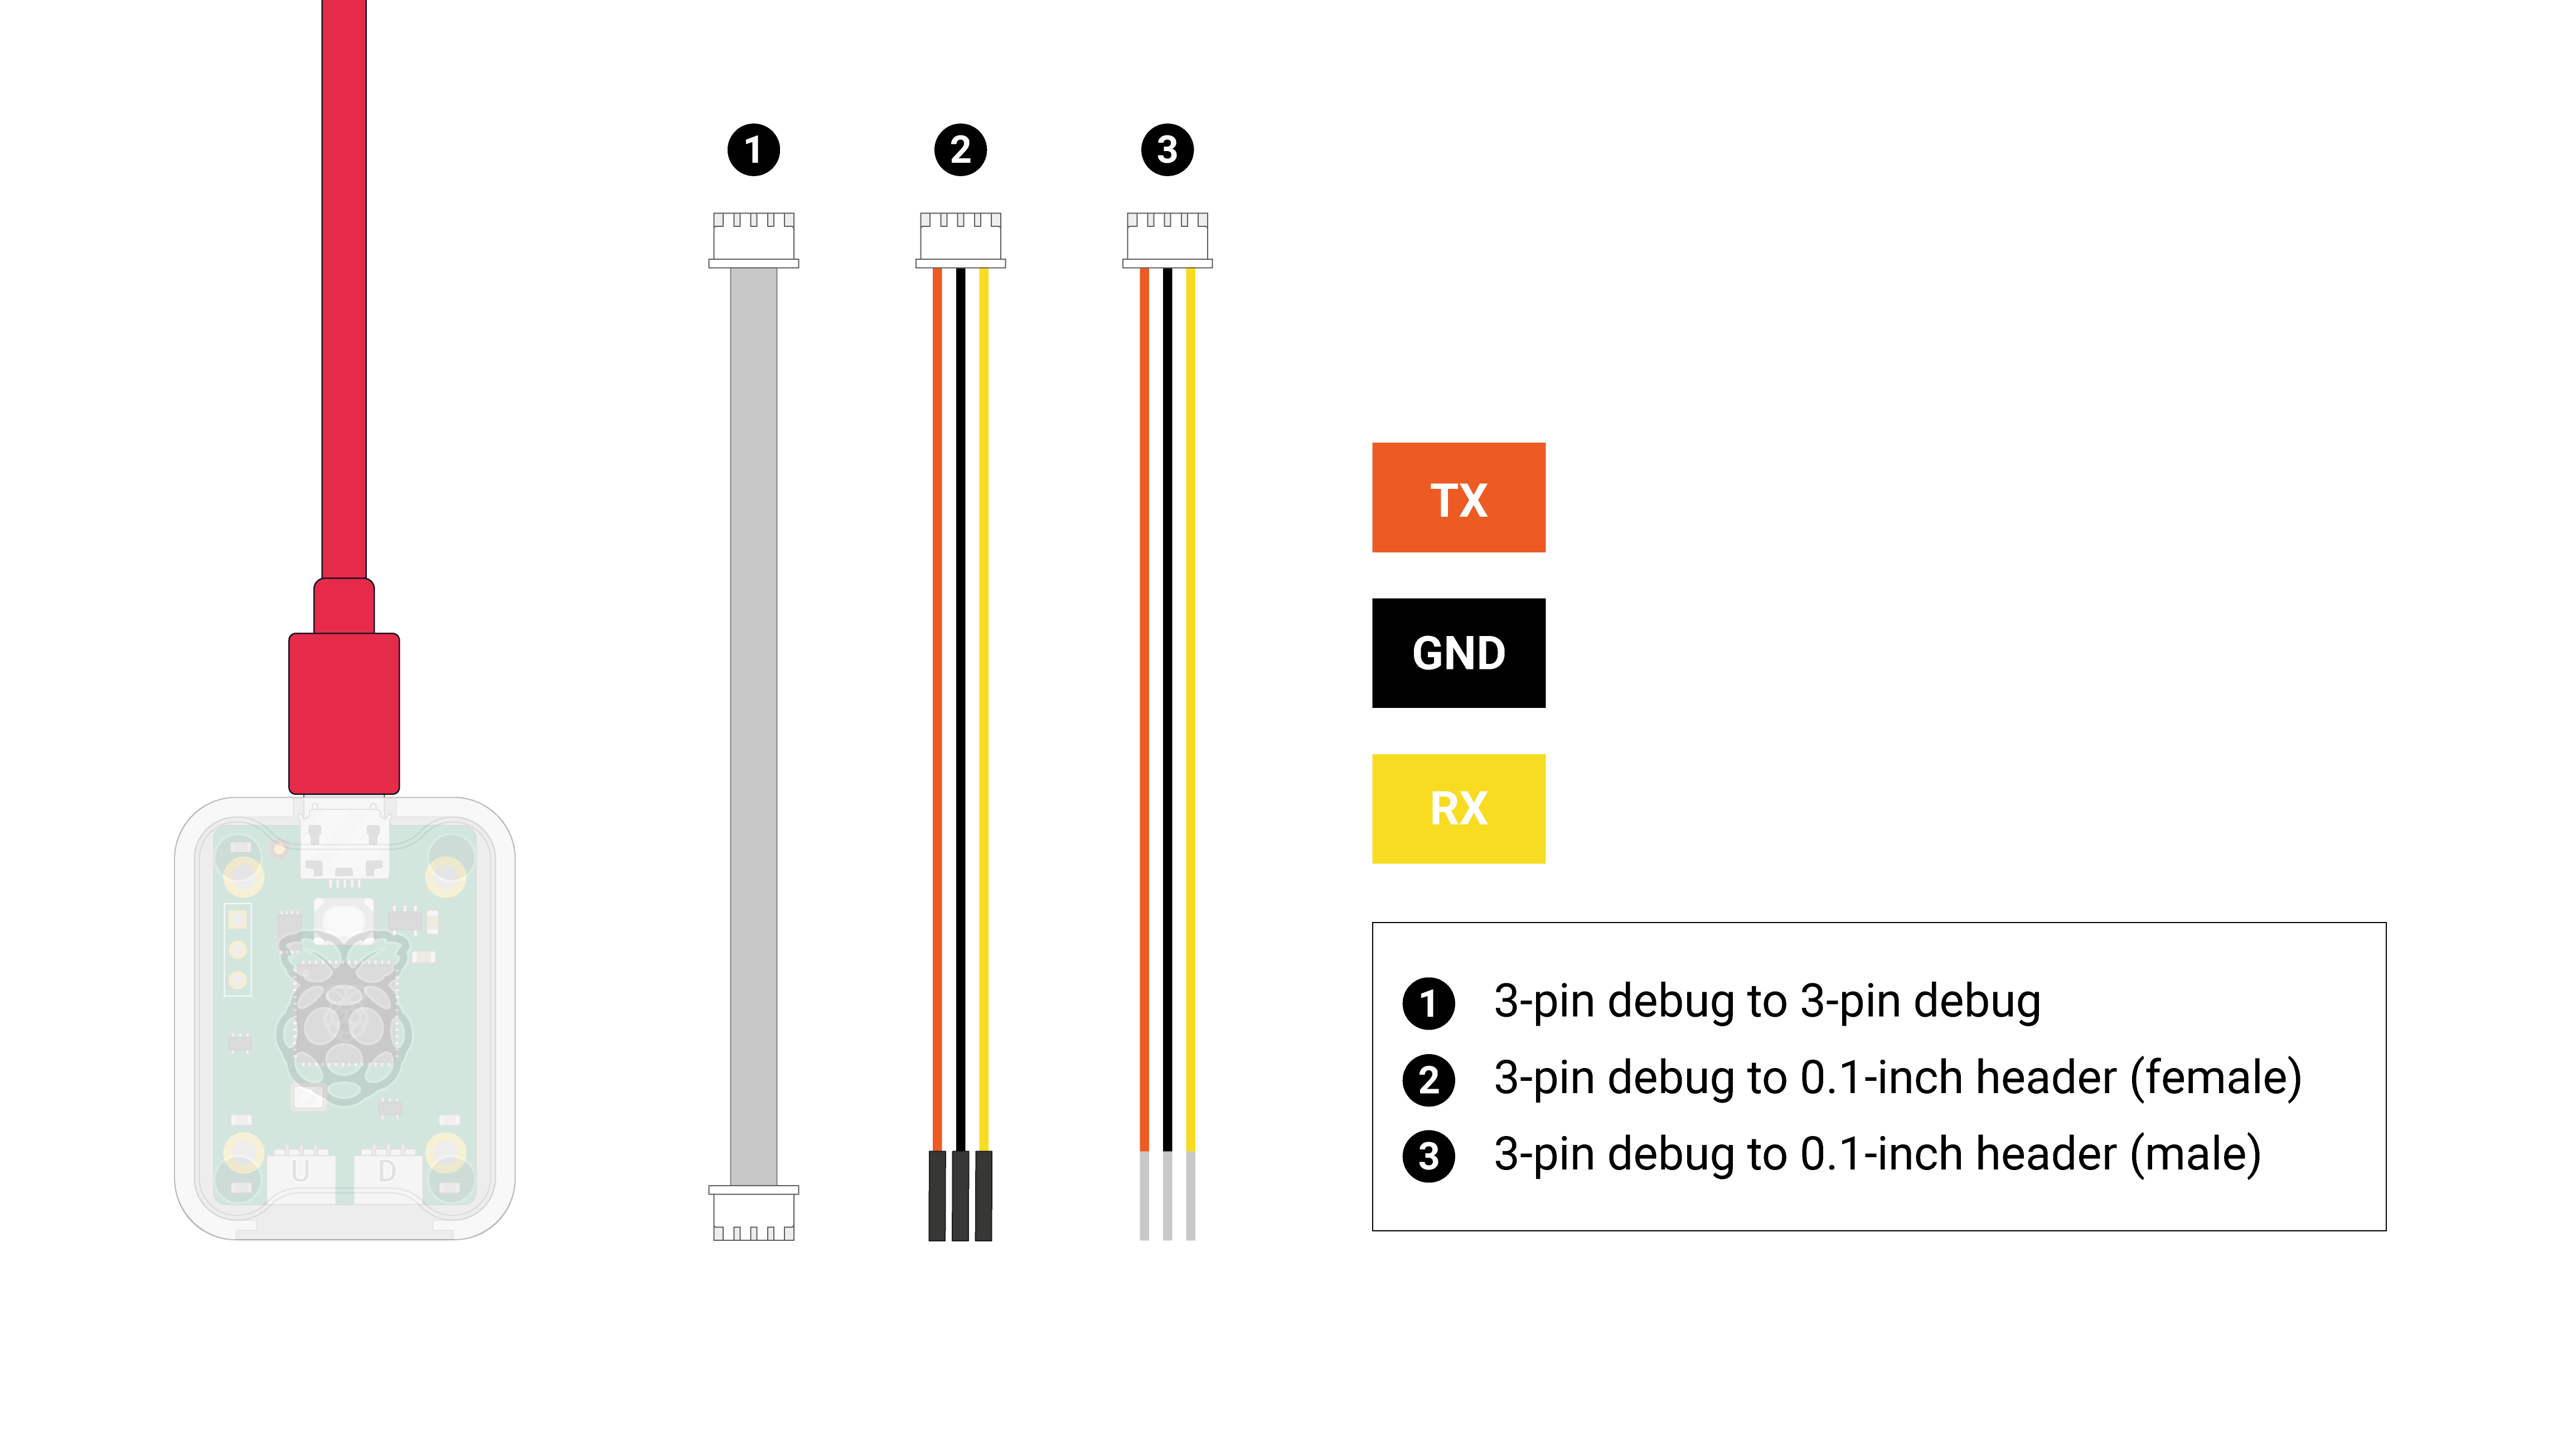
- Orange TX/SCLK (Output from Probe)
- Black GND
- Yellow RX/SWD (Input to Probe or I/O)
具体参见官方文档。
树莓派配置
在树莓派镜像里面找到 /boot/firmware/config.txt 文件,添加以下内容:
[all]
enable_uart=1
dtoverlay=uart0
dtoverlay=disable-bt
uart_2ndstage=1
enable_jtag_gpio=1

dtparam=fan_temp0=35000
dtparam=fan_temp0_hyst=5000
dtparam=fan_temp0_speed=175
dtparam=uart0=on
然后在 /boot/firmware/cmdline.txt 文件中修改成以下内容:
earlycon=pl011,0x107d001000,115200n8 console=tty1 console=ttyAMA0,115200 root=PARTUUID=5f127066-02 rootfstype=ext4 fsck.repair=yes rootwait quiet splash plymouth.ignore-serial-consoles cfg80211.ieee80211_regdom=CN
/boot/firmware/config.txt文件中的enable_jtag_gpio=1是启用 JTAG GPIO 的关键配置。
/boot/firmware/cmdline.txt文件中的console=ttyAMA0,115200原本应该是console=serial0,115200n8,但由于树莓派 CM5 的 Serial0 默认绑定那两个焊上的测试点,我们需要把串口转到 GPIO 14 和 15 上,因此需要将其修改为console=ttyAMA0,115200。
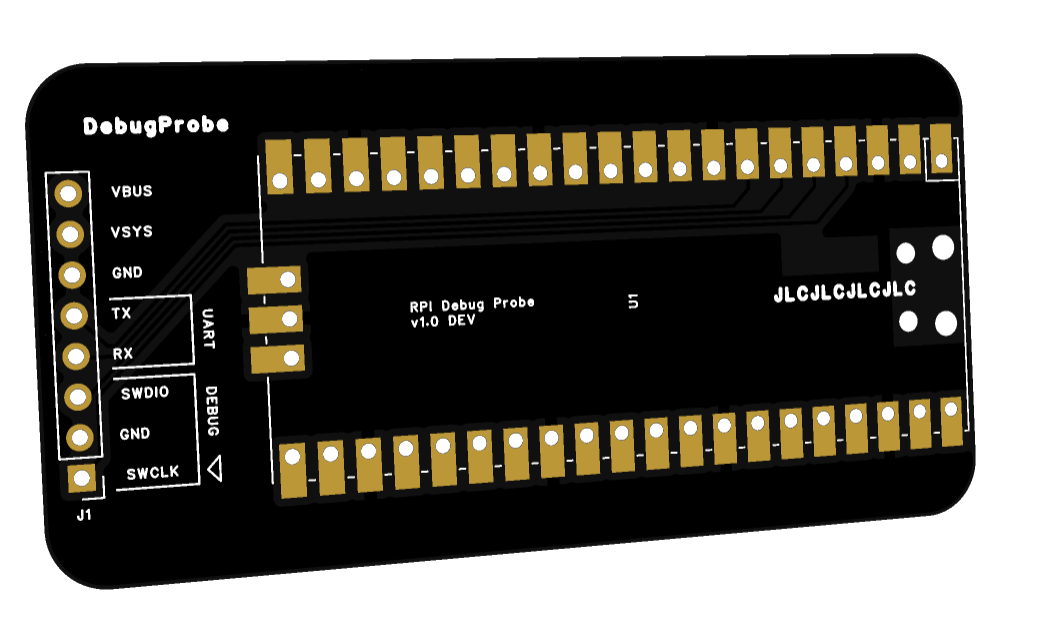
本人自制了一个带 3V3 的调试器,使用了树莓派官方的 Debug Probe,焊接了 3V3、GND、SWD 和 SCLK 四个引脚。
OpenOCD 配置
在电脑上安装 AArch64 GNU/Linux target (aarch64-none-linux-gnu),可以在此处下载。如果需要裸机编程,还需要安装 AArch64 bare-metal target (aarch64-none-elf)。
Windows版的 OpenOCD 可以在此处下载。
Linux 用户可以自己编译,也可以使用包管理器安装 OpenOCD。
安装好后可以打开终端,输入以下命令来检查 OpenOCD 是否安装成功:
cd <path_to_openocd>
.\openocd.exe --version
然后检查 AArch64 GNU/Linux target (aarch64-none-linux-gnu):
cd "C:\Program Files (x86)\Arm GNU Toolchain aarch64-none-linux-gnu\14.3 rel1\bin"
.\aarch64-none-linux-gnu-gdb.exe --version
接下来创建一个 OpenOCD 配置文件 rpi5.cfg,内容如下:
# SPDX-License-Identifier: GPL-2.0-or-later

# The Broadcom BCM2712 used in Raspberry Pi 5
# No documentation was found on Broadcom website

# Partial information is available in Raspberry Pi website:
# https://www.raspberrypi.com/documentation/computers/processors.html#bcm2712

# v1.0 initial revision - trejan on forums.raspberrypi.com

if { [info exists CHIPNAME] } {
        set  _CHIPNAME $CHIPNAME
} else {
        set  _CHIPNAME bcm2712
}

if { [info exists CHIPCORES] } {
        set _cores $CHIPCORES
} else {
        set _cores 4
}

if { [info exists USE_SMP] } {
        set _USE_SMP $USE_SMP
} else {
        set _USE_SMP 0
}

if { [info exists DAP_TAPID] } {
        set _DAP_TAPID $DAP_TAPID
} else {
        set _DAP_TAPID 0x4ba00477
}

transport select swd

swd newdap $_CHIPNAME cpu -expected-id $_DAP_TAPID -irlen 4
adapter speed 4000

dap create $_CHIPNAME.dap -chain-position $_CHIPNAME.cpu

# MEM-AP for direct access
target create $_CHIPNAME.ap mem_ap -dap $_CHIPNAME.dap -ap-num 0

# these addresses are obtained from the ROM table via 'dap info 0' command
set _DBGBASE {0x80010000 0x80110000 0x80210000 0x80310000}
set _CTIBASE {0x80020000 0x80120000 0x80220000 0x80320000}

set _smp_command "target smp"

for { set _core 0 } { $_core < $_cores } { incr _core } {
        set _CTINAME $_CHIPNAME.cti$_core
        set _TARGETNAME $_CHIPNAME.cpu$_core

        cti create $_CTINAME -dap $_CHIPNAME.dap -ap-num 0 -baseaddr [lindex $_CTIBASE $_core]
        target create $_TARGETNAME aarch64 -dap $_CHIPNAME.dap -ap-num 0 -dbgbase [lindex $_DBGBASE $_core] -cti $_CTINAME

        set _smp_command "$_smp_command $_TARGETNAME"
}

if {$_USE_SMP} {
        eval $_smp_command
}

# default target is cpu0
targets $_CHIPNAME.cpu0
或者使用以下内容:
# bcm2712.cfg
# SPDX-License-Identifier: GPL-2.0-or-later
# OpenOCD target config file
# This file is based on target/bcm2711.cfg
# I have checked that it works with Open On-Chip Debugger 0.12.0
# using the Raspberry Pi Debug-Probe interface

transport select swd
adapter speed 1000

if { [info exists CHIPNAME] } {
    set  _CHIPNAME $CHIPNAME
} else {
    set  _CHIPNAME bcm2712
}

if { [info exists CHIPCORES] } {
    set _cores $CHIPCORES
} else {
    set _cores 4
}

if { [info exists USE_SMP] } {
    set _USE_SMP $USE_SMP
} else {
    set _USE_SMP 0
}

if { [info exists DAP_TAPID] } {
    set _DAP_TAPID $DAP_TAPID
} else {
    set _DAP_TAPID 0x2ba00477
}

# swj_newdap $_CHIPNAME cpu -irlen 4 -ircapture 0x1 -irmask 0xf -expected-id $_DAP_TAPID
swd newdap $_CHIPNAME cpu -expected-id $_DAP_TAPID
dap create $_CHIPNAME.dap -chain-position $_CHIPNAME.cpu

# MEM-AP for direct access
target create $_CHIPNAME.ap mem_ap -dap $_CHIPNAME.dap -ap-num 0

# these addresses are obtained from the ROM table via 'dap info 0' command
set _DBGBASE {0x80010000 0x80110000 0x80210000 0x80310000}
set _CTIBASE {0x80020000 0x80120000 0x80220000 0x80320000}

set _smp_command "target smp"

for { set _core 0 } { $_core < $_cores } { incr _core } {
    set _CTINAME $_CHIPNAME.cti$_core
    set _TARGETNAME $_CHIPNAME.cpu$_core

    cti create $_CTINAME -dap $_CHIPNAME.dap -ap-num 0 -baseaddr [lindex $_CTIBASE $_core]
    target create $_TARGETNAME aarch64 -dap $_CHIPNAME.dap -ap-num 0 -dbgbase [lindex $_DBGBASE $_core] -cti $_CTINAME

    set _smp_command "$_smp_command $_TARGETNAME"
}

if {$_USE_SMP} {
    eval $_smp_command
}

# default target is cpu0
targets $_CHIPNAME.cpu0
然后新建一个 cmsis-dap.cfg 文件,内容如下:
# SPDX-License-Identifier: GPL-2.0-or-later

#
# ARM CMSIS-DAP compliant adapter
#
# http://www.keil.com/support/man/docs/dapdebug/
#

adapter driver cmsis-dap

# Optionally specify the serial number of CMSIS-DAP usb device.
# adapter serial 02200201E6661E601B98E3B9
启动 OpenOCD 开始调试
在终端中运行以下命令来启动 OpenOCD:
cd <path_to_openocd>
.\openocd.exe --file cmsis-dap.cfg --file rpi5.cfg
如果一切正常,你应该会看到类似以下的输出:
Open On-Chip Debugger 0.12.0 (2025-07-10) [https://github.com/sysprogs/openocd]
Licensed under GNU GPL v2
libusb1 d52e355daa09f17ce64819122cb067b8a2ee0d4b
For bug reports, read
        http://openocd.org/doc/doxygen/bugs.html
Info : Listening on port 6666 for tcl connections
Info : Listening on port 4444 for telnet connections
Info : Using CMSIS-DAPv2 interface with VID:PID=0x2e8a:0x000c, serial=0DA4770B2DB8B6AA
Info : CMSIS-DAP: SWD supported
Info : CMSIS-DAP: Atomic commands supported
Info : CMSIS-DAP: Test domain timer supported
Info : CMSIS-DAP: FW Version = 2.0.0
Info : CMSIS-DAP: Interface Initialised (SWD)
Info : SWCLK/TCK = 0 SWDIO/TMS = 0 TDI = 0 TDO = 0 nTRST = 0 nRESET = 0
Info : CMSIS-DAP: Interface ready
Info : clock speed 4000 kHz
Info : SWD DPIDR 0x2ba01477
Info : [bcm2712.ap] Examination succeed
Info : bcm2712.cpu0: hardware has 6 breakpoints, 4 watchpoints
Info : [bcm2712.cpu0] external reset detected
Info : [bcm2712.cpu0] Examination succeed
Info : bcm2712.cpu1: hardware has 6 breakpoints, 4 watchpoints
Info : [bcm2712.cpu1] external reset detected
Info : [bcm2712.cpu1] Examination succeed
Info : bcm2712.cpu2: hardware has 6 breakpoints, 4 watchpoints
Info : [bcm2712.cpu2] external reset detected
Info : [bcm2712.cpu2] Examination succeed
Info : bcm2712.cpu3: hardware has 6 breakpoints, 4 watchpoints
Info : [bcm2712.cpu3] external reset detected
Info : [bcm2712.cpu3] Examination succeed
Info : [bcm2712.ap] gdb port disabled
Info : [bcm2712.cpu0] starting gdb server on 3333
Info : Listening on port 3333 for gdb connections
Info : [bcm2712.cpu1] starting gdb server on 3334
Info : Listening on port 3334 for gdb connections
Info : [bcm2712.cpu2] starting gdb server on 3335
Info : Listening on port 3335 for gdb connections
Info : [bcm2712.cpu3] starting gdb server on 3336
Info : Listening on port 3336 for gdb connections
使用 GDB 连接 OpenOCD
在终端中打开 GDB,使用以下命令连接到 OpenOCD:
cd <path_to_aarch64_gnu_toolchain>
.\aarch64-none-linux-gnu-gdb.exe
然后在 GDB 中输入以下命令:
target remote :3333
将会看到类似以下的输出:
Remote debugging using :3333
warning: No executable has been specified and target does not support
determining executable automatically.  Try using the "file" command.
0xffffd06fcf183b48 in ?? ()
这表示你已经成功连接到 OpenOCD,并且可以开始调试 Raspberry Pi CM5。
更多调试命令可以参考 OpenOCD 和 GDB 的文档和手册。